

Text Anything™ User Instructions
User instructions for installation of the text panel, text utility bar component and general configuration items.
1. Install the Text Anything™ App
Text Anything™ is first A2P 10DLC compliant texting application for Salesforce. It is the safest, easiest and quickest way to start texting your customers from your Salesforce® account with integrated compliance. App installation is easy. Go to the appexchange, select the product and install it in your org. You will be asked whether to install it for administrators only, all users or specific groups. We recommend you install it for administrators only as most of your users will only need the texting components and do not need access to the application itself.
After installing the app you will need to add our Text Panel to one of your page layouts and you may also enable the Utility Bar Text Manager as well.
2. Installing the Chat Panel
On a record layout page, in the top right corner click the gear icon and “edit page”. In this example we are using a contact record but this works for any standard or custom object.
Text Anything™ is first A2P 10DLC compliant texting application for Salesforce®. It is the safest, easiest and quickest way to start texting customers from your Salesforce® account. You’re just a few minutes away from your first texts! This guide is a reference for the steps you will need to complete in order to get your account setup. If you have any questions you can text us at 833-433-0511 (feel free to include screen shots).
To send messages you need to do three things:
Configure “To Numbers” - phone numbers on records you wish to text.
Purchase Phone Numbers - these are the phone numbers your customers will see.
Assign Purchased Phone Numbers to Campaigns (this step is covered in step 4 - under Compliance Configuration)
2. Sending Messages - Setup
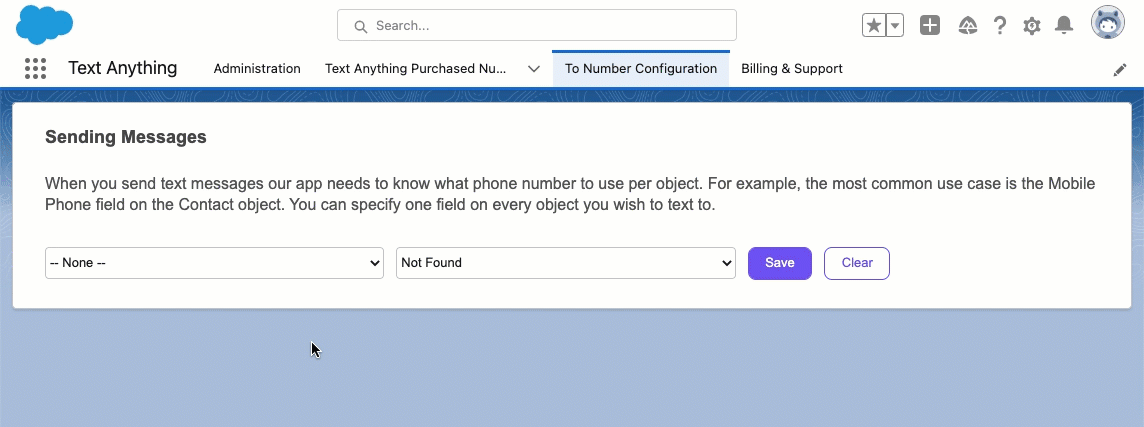
Configure “To Numbers”
“To Numbers” are your customer’s phone numbers. You need to specify which number fields on which objects they belong. For example: the “mobile” field on the “contact” object. Then if the chat panel is placed on the contact detail page layout it will automatically associate with related “mobile” numbers.
To configure your To Numbers, in the Text Anything™ Admin Panel go to the “To Number Configuration” tab. There you identify which numbers associated to which objects you wish to identify as textable numbers.
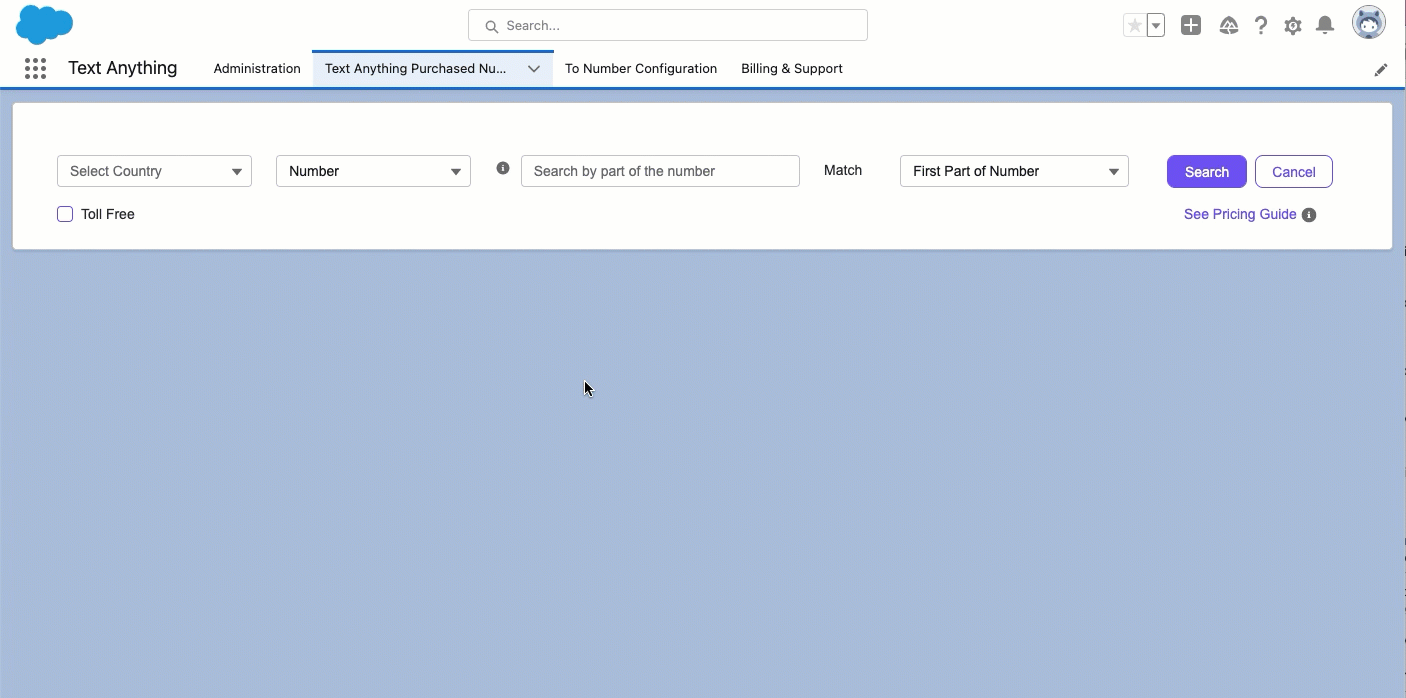
Purchase Phone Numbers
Purchased phone numbers are the numbers you use to text your customers. You can choose between local and toll free numbers in the US and Canada. By default you can purchase up to 50 numbers [the limit can be increased upon request]. In the Compliance Configuration section you will assign Purchased Numbers to campaigns, but for now simply purchase the numbers you want to start texting - you can always purchase or release numbers later.
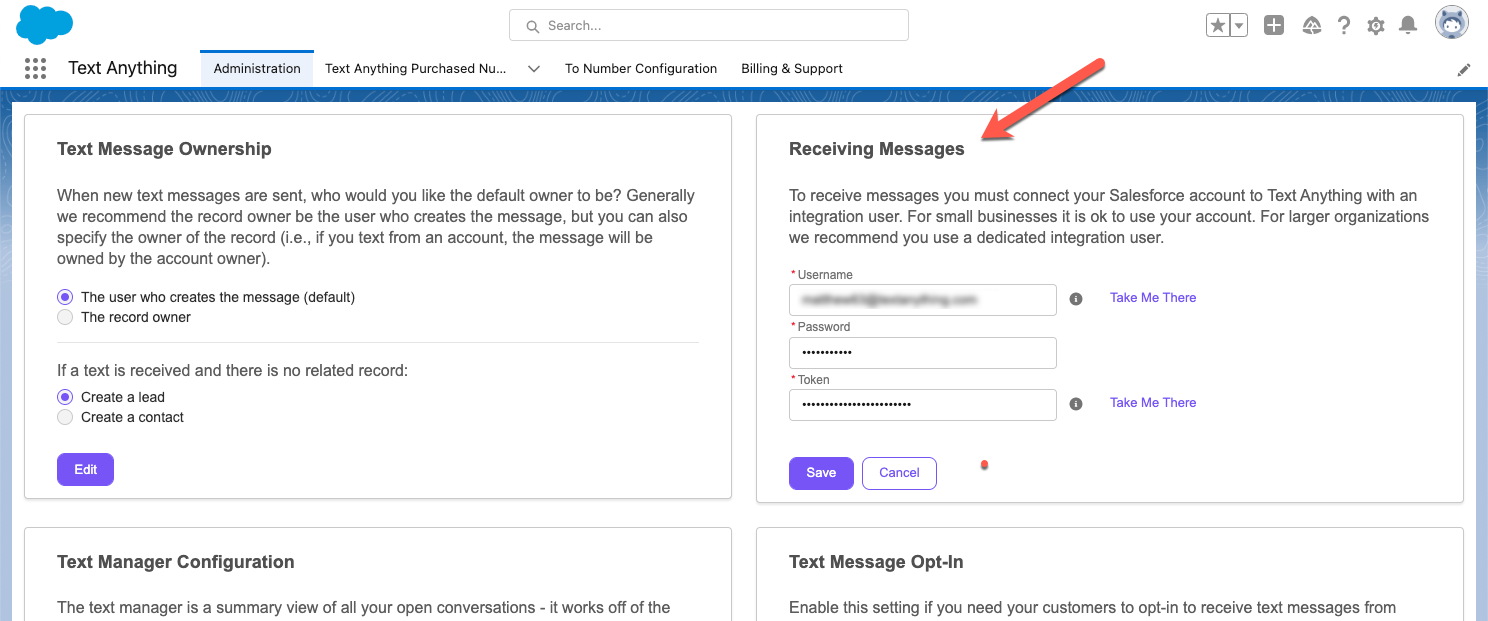
3. Receiving Messages - Setup
To receive messages [into Salesforce] you will need to setup an integration between your Salesforce org and the Text Anything cloud. This will require an integration user. For smaller organizations you may use a user’s account as your integration user, however, for Enterprise clients it is recommended you use a dedicated user license with an API only user profile.
You will need the username, integration user’s password and security token (paste only the security token - no prefix is required). You can use the “take me there” links to assist.
4. Compliance Configuration
5. Adding the Text User Interface(s)

Next, in the Activity tab click “Add a Tab”.

You will need to rename your tab. Here we called it “Text Panel”.

Now you can drop in the custom ‘TextAnythingChatPanel’ from from the list of custom components in the bottom left.
Overview

Next click “Save” and “Activate” and you are ready to start texting. The component will automatically associate records with any standard or custom object in whose page you place the component.